Installing your development environment
Andres Baravalle
Workshop 1: Installing your development environment
- Installing Apache and PHP on Windows
- Using your development tools
- Using the software in the KD labs
- Using the software in the UEL library and at home
Installing Apache and PHP on Windows
What will you need
Each week you will need:
- Your textbook
- A pendrive, to make a backup of your data
- a towel (ok that's not really needed)
Textbook and Documentation
 Week by week you will have to perform a number of activities in class. To be able to engage effectively you must be familiar with your textbook and I do strongly suggest that you take your textbook in class every time.
If you get stuck at any point during this week's activity, please follow the documentation in your textbook. The documentation in the book is euxastive and covers Linux, Windows and Mac architectures.
The book will go through the installation of Apache 1.x; I do recommend that you install version 2.2 or 2.4 instead. Most of the steps in the installation are identical.
Installing your software stack
Your first step is to install the software that we are going to need to use PHP effectively - in this order:
- Apache
- PHP
This documentation will cover installing the software stack on Windows only. You can user WAMP distributions instead - as XAMPP or WampServer but we are not going to look at it in class.
They are suitable as a development environment - but for production you should install the individual packages (ideally, on Linux or on another Unix-like system).
You need to be a superuser!
Before we start, keep in mind that you need to be able to install software in the system (be a "local administrator" or "elevated user" in Windows) to be able to proceed with the installation of Apache and PHP.
If you do not have the appropriate rights, you cannot proceed with the installation of Apache and PHP.
If you are in our lab, someone will be typing the password for you when needed.
Activity #1: Installing Apache on Windows
Download and install the latest stable version of Apache HTTPD available on the Apache Lounge web site. You should be able to follow the links and find the right version (64 bits vs 32 bits, depending on your operating system); take a note of the VC version (VC11 as of 2/2/2015) you are installing.
You can use the default settings - the task shouldn't take over 15 minutes.
Apache will be installed under your Programme Files (x86) folder.
After you have installed the web server, try to open your defaul home page at http://localhost/.
Please refer to Installing Apache Under Windows in your core text book if you run into troubles in the installation.
Activity #2: Configuring and managing Apache
The main web server configuration is located in conf/httpd.conf (we will need to modify this when installing PHP).
The log files (access_log and error_log) are located in the logs folder.
Open your error_log file and verify if any errors have been logged. You should see at least one error.
Activity #3: Running Apache
You can stop the server to free resources and you must restart the server after any changes in the configuration. To start/stop/restart the server, you can use the Services administration tool or the command line (net start|stop apachexyz).
The Apache installation also installs a set of menu items to start/stop/restart the server.
For more details, follow the Microsoft documentation.
Installing PHP - What VC version?
To use a recent version of PHP (PHP > 5.3), you will need a version of Apache compiled with Visual Studio 2012 - VC11.
Please refer to the Apache documentation.
Activity #4 : Installing PHP (1 of 2)
Download and install PHP the from the PHP web site. Download the thread safe version, and follow this documentation: https://www.php.net/manual/en/install.windows.apache2.php
The version of VC used to compile PHP must match the one used for Apache (look for the string VC9, VC10 or VC11 in the PHP links). If you have installed an Apache compiled with VC11, you need to have a version of PHP compiled with VC11.
Activity #4 : Installing PHP (2 of 2)
Install PHP as an "Apache handler" and make sure that you change your httpd.conf file as per documentation.
Make sure that the DLL that you are loading matches both the version of Apache that you are using (e.g. 2.2) and the type of installation ("Apache handler"). For Apache 2.4 and PHP5, the files is php5apache2_4.dll. For Apache 2.2 and PHP5, the file is php5apache2_2.dll.
Installing PHP on Windows can be troublesome and can take anything between 10 minutes and several hours.
Configuring PHP
The main PHP configuration is located in php.ini. You will not need to modify the file now, but you may need to modify it for advanced usage of PHP.
Web server and command line
You can run PHP scripts:
- Through a web server (e.g. http://localhost/test.php)
- From the command line (e.g. php test.php)
Web server and command line (2)
You can use PHP both to write command line scripts and web pages/applications.
You should test and debug command line scripts in the proper environment; occasionally it might be convenient to debug web pages from the command line (e.g. to increase the level of verbosity without changing PHP settings).
Activity #5: Testing the PHP installation
Create a text file in your Apache root folder (htdocs) with your notepad and call it test.php.
Include this code:
<?php
phpinfo();
?>
Restart Apache and open http://localhost/test.php.
Activity #6: Running from the command line
You can run PHP scripts from the command line.
Open a command prompt and change to your Apache htdocs folder.
Run:
c:\Program Files\php\php.exe test.php
Update paths as needed to reflect the local folder structure.
If you have had any problems...
Seek help! You need to complete all the previous steps before moving forward.

If you can't use Apache
If, for any reason, the Apache + PHP combination doesn't work, you can still test you PHP page using the built-in web server included in PHP since version 5.4.
Copy your test.php file in the PHP folder.
Open a terminal in the PHP folder and run:
php.exe -S localhost:8000Then open your browser at the address http://localhost:8000/test.php
Using your development tools
Your development environment
You should have already installed on your system these editors:
- Notepad++, to write quick scripts
- Aptana Studio and Eclipse to write more complex scripts
You'll start to use them shortly.
Do not use software as Microsoft Word or TextEdit. They are not suitable for programming.
PHP and code generators
A number of environments automatically generate your PHP code (e.g. Adobe Dreamweaver when using Behauviours).
Never, ever use automatic code generators; automatic code generators make it very hard to mantain the code, or to build on top of existing code.
Instead, you must study the PHP lexical structure and speed up your development using:
- Frameworks, as Zend, CakePHP or CodeIgniter
- External libraries - e.g. PEAR classes.
PHP editors: Notepad++
Notepad++ is a general-purpose lightweight text editor, that can be used to write code in a number of different programming languages.
Editing features include:
- Auto-completion
- Syntax highlighting and syntax folding
- Brace and indent highlighting
- Regular expression find and replace
- Macro recording and execution
- Function list
Additional plugins allow to extend the program and integrate further features.
PHP editors: Eclipse
Eclipse is both an editor and a generic platform used to build editors.
The original codebase was developed by IBM, and is now developed and maintained by a large community.
Eclipse:
- Can support most of the more commonly used programming languages, including Java, Python, PHP, C/C++ etc.
- Is one of the most popular text editors (over 2,000,000 downloads as of September 18th 2013 for Eclipse 4.3)
- Includes a large library of plugins that extend its features
PHP editors: Eclipse (2)
Editing features include:
- Auto-completion
- Syntax highlighting and syntax folding
- Context-sensitive documentation
- Regular expression find and replace
- Project overview
- Running and debugging scripts
- Additional plugins allow to extend the program and integrate further features
PHP editors: Aptana Studio
Aptana Studio is a editor built on top of Eclipse, targeting development using Python and PHP
Aptana Studio is a more complete application compared to all the ones seen in the previous slides
- It includes all the features of the standard eclipse, integrated with a large number of plugins focusing on Python, PHP and web technologies in general
Eclipse vs Aptana Studio
- Use Eclipse for a lighter environment and/or if you need only few plugins
- Use Aptana Studio for an environment with more features and easier support for debugging and running of scripts
- Aptana Studio is a less stable application; you will notice occasional errors that are due to bugs in the codebase
- Remember that neither you nor the university is paying for the software.
And it's all Open Source
Open Source is software released under a license that guarantees to its users the:
- Freedom to use it
- Freedom to modify it
- Freedom to redistribute it
And it's all Open Source (2)
Free to use means that Open Source software can be used without restrictions:
- It does not mean “free as in free beer”. Free is as in the French and Spanish libre
- In your case, all the software that we are going to use in class is also “free as in free beer”
Other options
Other editors include:
- Zend Studio
- Netbeans
- PHP Tools for Visual Studio
- vim (of course)
Using the software in the KD labs
Apache and PHP
Earlier on you should have successfully installed Apache and PHP. For security, maintanance and good practice reasons you will not be running your own version of Apache on your local machine.
You will instead use a remote installation of Apache and PHP for deployment (and a local installation of PHP for testing basic scripts).
Where to store your files
I suggest you store your files on your local documents folder or the desktop for the duration of the class and copy them on a pen drive at the end of each class.
Any content left on the class PCs may (and will) be deleted.
eapp
eapp (eclipse/apatana/python/php) is a package we have compiled including:
- Custom Eclipse, including plugins relevant for this module
- vanilla Aptana
- PortablePython
- PHP
and a few other bits 'n' pieces.
This does not include Apache - you will have to deploy your files to our web server.
eapp: folders and files
aptana-studio-x |
Aptana Studio (x is version number) |
eclipse |
Eclipse |
notepad++ |
notepad++ |
portable-git-x.y.z |
git (used for versioning and configuration management; x.y.z is version number) |
| php5.4 and php5.6 | PHP binaries |
| hello.php | your Hello World in PHP |
other files/folders |
ignore – not relevant on this module |
eapp in the KD labs
You can use eapp in the KD labs:
- The software is installed locally in each computer (good for performance, good for customisation)
- The software is available in C:\CN5109\eapp
- Explore the C:\CN5109\eapp folder to find the php.exe file; both php 5.4 and 5.6 are included (you will need to use this in the next activities)
Before we start
In the next activities we will be running a simple "Hello World" file in PHP
We'll create the file with all our editors and run it from the command line and from the server.
The file should just include the following line:
<?php
echo "Hello  World";
?>
If you have any problems, use the hello.php file in the root of the EAPP package.
Activity #7: running hello.php
Run the existing hello.php from the command line.
Please go back and review Activity #5 if you do not remember how to run PHP files.
Activity #8: running hello.php from your localhost
Copy the existing hello.php into your Apache root folder and open it from the browser.
Activity #9: using Notepad++
Set up Notepad++ to run PHP scripts using the NppExec plugin:
The start-up string is: "C:\CN5109\eapp\php5.4\php.exe" "$(FULL_CURRENT_PATH)" (make sure you include the quotes)
Update paths as needed to reflect the local folder structure (it will vary depending on your lab).
Write your hello.php and run it!
A demo (based on Python! remember: you are using PHP) is available here.
Activity #10: using Aptana
Assuming that you are in the KD lab, we'll set up and test your development environment:
- Run Aptana Studio
- Create a new PHP project
- Open and create your hello.php script
A demo (based on Python! remember: you are using PHP) is available here.
Notes on Aptana
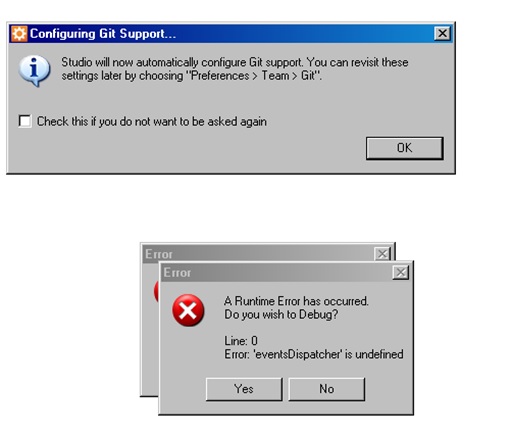
You may find start-up errors when running Aptana Studio; you can normally ignore the start-up errors.
You do not need to configure Git support; please select "Check this if you do not want to be asked again".
Activity #11: using Eclipse
Set up Eclipse as you have done with Aptana Studio (local install) and:
- Run Aptana Studio
- Create a new PHP project
- Open and create your hello.php script
Make sure that you configure your PHP path. Use Run -> Run to test your script
Using the software in the UEL library and at home
eapp in the library
You will be able to access a copy of eapp in most clusters in the Docklands library (but not in other areas of the institution).
eapp at home
Remember: eapp uses Open Source software only; that means that you can use the full software stack at home
Just download the software from here (about 800mb).
Copy in your c:\Program Files (x86) (or c:\Program Files) folder and start using it
Are you using Linux or any kind of *nix?
Good! Download and install the individual components of eapp on your computer.
Make sure you download and install the Linux (or *nix) version and that it matches your architecture (32 vs 64 bits).
Are you using a Mac?
That's ok – we're against discrimination, even if you are using a Mac. Download and install the individual components of eapp on your computer
Make sure you download and install the Mac version and that it matches your architecture (32 vs 64 bits)
On a USB stick
You can download an copy eapp on a USB stick; you will be able to use your software in any computer.
Is it slower than a local install.
Have you finished?
Share your experience on twitter #uel #cn5109
This work
This work is licensed under a Creative Commons Attribution-ShareAlike 3.0 Unported License
