Installing your development environment
by Andres Baravalle
Workshop 4: Installing your development environment
- Windows/Linux, Apache, MySQL and PHP
- Installing Apache and PHP on Windows
- Installing MySQL and phpMyAdmin
- Installing Drupal
- Using your development tools
- Using the software in the KD labs
- Using the software in the UEL library and at home
Windows/Linux, Apache, MySQL and PHP
The LAMP/WAMP stack
This course will enable you to build dynamic web sites and web applications based on (part of) the LAMP/WAMP stacks (an n-tier architecture) and Drupal.
We will start with an introduction to the main elements of the software stack that we will be using:
- The web server (Apache)
- The database server (MySQL)
- The server side programming language (PHP)
- A content management system (Drupal)
Apache
Web servers are in charge of delivering static HTML pages and any additional content needed in the page to the clients.
When a web server receives a request for an URL (uniform resource locator), the web server will try to locate the request on the file system and send it to the client.
Here is what a simple HTTP request looks like (short screencast here):
telnet mastodon.uel.ac.uk 80
Trying 161.76.74.2...
Connected to mastodon.uel.ac.uk.
Escape character is '^]'.
GET / HTTP1.0
MySQL
MySQL is one of the world's most widely used databases, and the most popular Open Source database server.
MySQL supports a broad subset of ANSI SQL 99, as well as extensions. By default, it ships with no GUI, and is normally administered either from the command line or with third-party tools as phpMyAdmin.
MySQL is currently owned by Oracle and the original developer of MySQL has now created a competing Open Source product, MariaDB. MariaDB is compatible with MySQL. Websites as google and wikipedia and Linux distributions as Fedora are migrating to MariaDB.
Mastodon is using MySQL - but you can decide to use MariaDB on your development environment.
PHP
PHP is a Open Source server-side scripting language; you will be integrating components written in PHP and/or writing your PHP scripts.
Drupal
- Drupal is a content management system (CMS) written in PHP
- It is used as a back-end framework for at least 2.1% of all websites worldwide
- It can be used for projects ranging from personal blogs to corporate, political, and government sites
- It's used on whitehouse.gov!
What is a CMS?
In the past years you have seen how to:
- Create static HTML pages
- Create dynamic HTML pages (e.g. with ASP.NET or PHP)
Content management systems are web applications that allows developers to quickly create on-line content.
We will learn more about Drupal and CMS in the next workshops.
Development and deployment
As part of this module, you will be able to use mastodon to develop & deploy your applications.Deployment on mastodon works from UEL only; the rest of the workshop is dedicated on setting up your own development environment, complete with Apache, MySQL, PHP and Drupal.
If you decide to work on your own development environment (rather than on mastodon), you will have to consider issues as syncronising your work with your teammates.
Installing Apache and PHP on Windows
Installing your software stack
Your first step is to install the software that we are going to need to use Drupal effectively. We will proceed in this order:
- Apache
- PHP
- phpMyAdmin
- Drupal
This documentation will cover installing the software stack on Windows only. You can user WAMP distributions instead - as XAMPP, WampServer or EasyPHP.
They are suitable as a development environment - but for production you should install the individual packages (ideally, on Linux or on another Unix-like system).
You need to be a superuser!
You need to be able to install software in the system (be a "local administrator" in Windows) to be able to proceed with the installation of Apache and PHP.
If you are not a local administrator, skip to the next steps.
Activity #1: Installing Apache
Download and install the latest stable version of Apache HTTPD from the Apache web site. You should be able to follow the links and find the right version: httpd-xyz-win32-x86-openssl-xyz.msi (xyz will be numbers representing the Apache and OpenSSL versions).
You can use the default settings - the task shouldn't take over 15 minutes.
After you have installed the web server, try to open your defaul home page at http://localhost/.
Activity #2: Configuring and managing Apache
The main web server configuration is located in conf/httpd.conf (we will need to modify this when installing PHP).
The log files (access_log and error_log) are located in the logs folder.
Open your error_log file and verify if any errors have been logged.
.htaccess files
Apache's global settings are in conf/httpd.conf.
.htaccess files can be used to override Apache settings on a per-directory basis, when root access on the server system is not available.
You will use .htaccess files later on when configuring Drupal; the documentation is available here.
Activity #3: Running Apache
You can stop the server to free resources and you must restart the server after any changes in the configuration. To start/stop/restart the server, you can use the Services administration tool or the command line (net start|stop apachexyz).
For more details, follow the Microsoft documentation.
Activity #4: Installing PHP (part 1)
Download the latest stable, thread safe version of PHP from the PHP web site. Follow this documentation: https://www.php.net/manual/en/install.windows.apache2.php
Make sure that the version of PHP you are downloading matches your operating system (Windows) and architecture (e.g. x86 vs x64).
Activity #4: Installing PHP (part 2)
Install PHP as an "Apache handler" and make sure that you change your httpd.conf file as per documentation.
Make sure that the DLL that you are loading matches both the version of Apache that you are using (e.g. 2.2) and they type of installation ("Apache handler"). E.g. for Apache 2.2 and PHP5, the files is php5apache2_2.dll, and for Apache 2.4 and PHP5, the file is php5apache2_4.dll.
Installing PHP on Windows can be troublesome and can take anything between 10 minutes and several hours.
Configuring PHP
The main PHP configuration is located in php.ini. You will not need to modify the file now, but you may need to modify it if you are managing your web server.
Activity #5: Testing the PHP installation
Create a text file in your Apache root folder (htdocs) with your notepad and call it test.php.
Include this code:
<?php
phpinfo();
?>
Restart Apache and open http://localhost/test.php.
If you have had any problems...
Seeks help! You need to complete all the previous steps before moving forward.
Installing MySQL and phpMyAdmin
MySQL and phpMyAdmin
We show now have:
- A working installation of Apache
- A working installation of PHP as Apache module
The next step is to install a database server (MySQL) and a frontend for MySQL (phpMyAdmin).
Activity #6: Installing MySQL
Download the latest stable (Generally Available, using MySQL's therminology) version of MySQL (full name: MySQL Community Server) from the MySQL web site.
Follow this documentation: http://dev.mysql.com/doc/refman/5.6/en/mysql-installer.html
Make sure that the version of MySQL you are downloading matches your operating system (Windows) and architecture (e.g. x86 vs x64).
Using MySQL
MySQL is a client-server architecture; to use MySQL you need a MySQL server running ("service" in Windows) and a MySQL client.
The most basic MySQL client is available from the command line.
Activity #7: Command line MySQL (part 1 - connecting)
Connect to your MySQL server with your command line mysql client (where is it installed?):
mysql -u user -ppassword
A video guiding you through the next activity is available here.
Activity #7: Command line MySQL (part 2 - selecting a database)
To be sure everything is working correctly, show the list of databases:
SHOW databases;If everything is correct, you should get a list of the databases in the server.
You can select a database with use:
USE mysql;
This selects the administrative database (where settings and passwords are stored) for mysql.
Activity #7: Command line MySQL (part 3 - querying and adding users)
List user details:
SELECT Host, User, Password FROM user;
Add a user:
GRANT ALL PRIVILEGES ON dbname.* TO username@hostname IDENTIFIED BY 'userpassword'
More on MySQL
Using MySQL is not dissimilar to use other tools that you have used before - as Oracle or Microsoft Access.
If you need further information, you can start from here.
PHP and MySQL
Altough PHP is often used with MySQL, MySQL support in PHP is implemented in a separate module (also called extension), php_mysqli.
The PHP documentation includes extensive information on installing modules.
Activity #8: Configuring PHP to use MySQL
To use MySQL from PHP, you need to enable the MySQL extension (mysqli, NOT mysql).
This requires editing the php.ini file and loading the mysqli extension:
extension=php_mysqli.dllYou will need to use the same procedure to load any other PHP modules you may need.
After enabling the module, you will need to restart Apache.
Activity #9: Testing it all
Create a file to test your Apache, MySQL and PHP installation:
<?php
$mysqli = new mysqli("localhost", "root", "12ajkvxc", "mysql");
if ($mysqli->connect_errno) {
	printf("Connect failed: %s\n", $mysqli->connect_error);
	exit();
}

if ($result = $mysqli->query("SELECT Host, User, Password FROM user;")) {
    $row = $result->fetch_array(MYSQLI_NUM);
    print_r($row);
}
?>
This will list the main details of the first user registed on your MySQL server.
More PHP?
We are not going to cover PHP; you should be familiar with some type of server side development from your previous studies.
If you need to improve your PHP skills, you can use this as starting points:
Welling, L. and Thomson, L. (2008) PHP and MySQL web development. 4th edn. London: Addison Wesley.
Activity #10: Installing phpMyAdmin
Download the latest stable version of phpMyAdmin from the phpMyAdmin web site (select the English only version; download the zip archive).
You will have to:
- Download the software
- Decompress the archive
- Move the archive in an appropriate folder, in your web root ( = in your Apache httpdocs folder)
- Configure as needed
Follow this documentation: http://docs.phpmyadmin.net/en/latest/setup.html#installing-on-windows
Installing Drupal
Activity #11: Installing Drupal
Download the latest stable version of Drupal (currently, version 7) from the Drupal web site.
As you did with phpMyAdmin, you will have to:
- Decompress the archive
- Move the files into your web root (e.g. in a folder named drupal)
- Configure the database in the settings.php file
Using your development tools
Your development environment
You should have already installed on your system these editors:
- Notepad++, to write quick scripts
- Aptana Studio and Eclipse to write more complex scripts
You'll start to use them shortly.
PHP editors: Notepad++
Notepad++ is a general-purpose lightweight text editor, that can be used to write code in a number of different programming languages.
Editing features include:
- Auto-completion
- Syntax highlighting and syntax folding
- Brace and indent highlighting
- Regular expression find and replace
- Macro recording and execution
- Function list
Additional plugins allow to extend the program and integrate further features.
PHP editors: Aptana Studio
Aptana Studio is a editor built on top of Eclipse, targeting development using Python and PHP
Aptana Studio is a more complete application compared to all the ones seen in the previous slides
- It includes all the features of the standard Eclipse, integrated with a large number of plugins focusing on Python, PHP and wioeb technologies in general
Uploading files: WinSCP
You can use Apatana Studio to upload your files on your web server (mastodon) or you can use a custom application as WinSCP.
WinSCP is typically easier to use compared to Aptana.
And it's all Open Source
Open Source is software released under a license that guarantees to its users the:
- Freedom to use it
- Freedom to modify it
- Freedom to redistribute it
Software that is not Free Software is usually called proprietary
Free Software and Open Source are synonyms used by different groups that see a different role for Free Software/Open Source
And it's all Open Source (2)
Free to use means that Open Source software can be used without restrictions:
- It does not mean “free as in free beer”. Free is as in the French and Spanish libre
- In your case, all the software that we are going to use in class is also “free as in free beer”
Other options
Other editors include:
- Zend Studio
- Netbeans
- PHP Tools for Visual Studio
- Adobe Dreamweaver
- Microsoft Expression Web
- vim (of course)
Using the software in the KD labs
eapp-win32
eapp-win32 (eclipse/apatana/python/php) is a package we have compiled including:
- Custom Eclipse, including plugins relevant for this module
- vanilla Aptana
- PortablePython
- PHP
and a few other bits 'n' pieces.
eapp-win32: folders and files
aptana-studio-x |
Aptana Studio (x is version number) |
eclipse-platform-x.y-win32 |
Eclipse (x.y is version number) |
notepad++ |
notepad++ |
portable-git-x.y.z |
git (used for versioning and configuration management; x.y.z is version number) |
| php5.4 | python (includes IDLE; x.y is version number) |
| hello.php | your Hello World in PHP |
| winscp | To upload files on Mastodon |
other files/folders |
ignore – not relevant on this module |
eapp-win32 in the KD labs
You can use eapp-win32 in the KD labs:
- The software is installed locally in each computer (good for performance, good for customisation)
- The software is available in C:\Program Files (x86)\eapp-win32
- Your PHP executable is in C:\Program Files (x86)\eapp-win32\php5.4\php.exe (you will need to use this in the next activities)
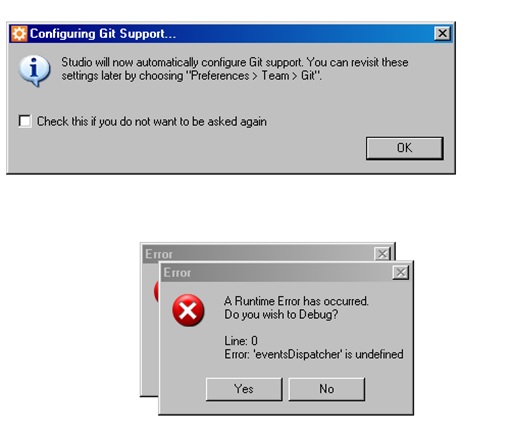
Notes on Aptana
You may find start-up errors when running Aptana Studio; you can normally ignore the start-up errors.
You do not need to configure Git support; please select "Check this if you do not want to be asked again".
Using the software at home
eapp-win32 at home
Remember: eapp-win32 uses Open Source software only; that means that you can use the full software stack at home
Just download the software from here (about 580mb).
Copy in your c:\Program Files (x86) (or c:\Program Files) folder and start using it
A better eapp-win32
- eapp-win32 is using the 32 bits version of the applications
- Most of you might already have a 64bits processor and operating system
- If that's the case, you can create your own eapp-win64 using the 64 bits version of the individual apps
- This will give you a performance gain.
Are you using Linux or any kind of *nix?
Good! Download and install the individual components of eapp-win32 on your computer.
Make sure you download and install the Linux (or *nix) version and that it matches your architecture (32 vs 64 bits).
Are you using a Mac?
That's ok – we're against discrimination. Download and install the individual components of eapp-win32 on your computer
Make sure you download and install the Mac version and that it matches your architecture (32 vs 64 bits)
On a USB stick
We would recommend that you download an install eapp-win32 on a USB stick too.
You will be able to use your software in any computer (including the library), without needing to install the software (but it is slower than a local copy).
Have you finished?
Share your experience on twitter #uel #im3082
This work
This work is licensed under a Creative Commons Attribution-ShareAlike 3.0 Unported License
